Workflow
The scaffolding process should have created a new construct (The s3 Bucket) for you in the directory targeted by outdir of your construct in the .projenrc.ts file
for instance, if your outdir value was:
outdir: 'constructs/s3-bucket',
You should now have a a new directory called s3-bucket located in the constructs folder, with a directory structure resembling this:
root->constructs->s3-bucket
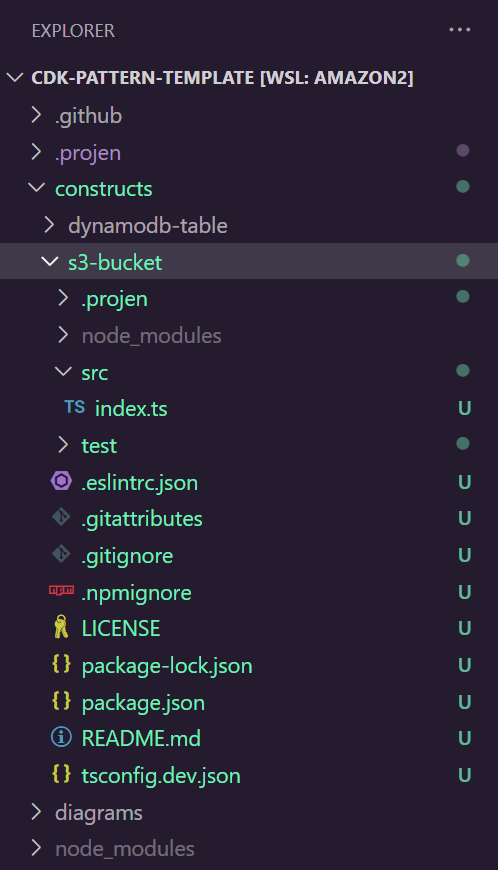
Notice that the s3-bucket directory contains the following subdirectories:
src
test
Navigate to the /src directory of our construct.
Source Code
First, we need to uncomment the contents of index.ts inside the src directory. When it is first initialized by projenrc.ts, the output should be:
// export * from './s3-bucket';
The new empty src/index.ts file:
export * from './s3-bucket';
After adding the code to index.ts don’t be alarmed if your IDE highlights not being able to see ‘./s3-bucket’
We add this because src/index.ts should export the interfaces and classes from the construct class we created.
We can now create a new file in the src directory called s3-bucket.ts
Inside of the s3-bucket.ts file we will add:
Note: This file has been created with all of its code commented out. Please uncomment it.
/*
© 2021 Amazon Web Services, Inc. or its affiliates. All Rights Reserved.

This AWS Content is provided subject to the terms of the AWS Customer Agreement
available at http://aws.amazon.com/agreement or other written agreement between
Customer and either Amazon Web Services, Inc. or Amazon Web Services EMEA SARL or both.
*/
import { AppConfig, createBucketName } from '@assembly-line-core/common';
import { RemovalPolicy } from 'aws-cdk-lib';
import { BlockPublicAccess, Bucket, BucketAccessControl, BucketProps } from 'aws-cdk-lib/aws-s3';
import { Construct } from 'constructs';

export interface S3BucketConfig extends BucketProps {
  readonly appConfig: AppConfig;
}

export class S3Bucket extends Construct {
  private readonly _bucket: Bucket;

  constructor(scope: Construct, id: string, config: S3BucketConfig) {
    super(scope, id);

    if (!config || !config.appConfig) {
      console.error('[ERROR] S3 config and config.appConfig cannot be NULL.');
      throw new Error('[ERROR] S3 config and config.appConfig cannot be NULL.');
    }

    const bucketName = createBucketName(config.appConfig, id, config.bucketName);

    const bucketConfig: BucketProps = {
      accessControl: BucketAccessControl.PRIVATE,
      blockPublicAccess: BlockPublicAccess.BLOCK_ALL,
      enforceSSL: true,
      autoDeleteObjects: true,
      publicReadAccess: false,
      removalPolicy: RemovalPolicy.DESTROY,
      ...config,
      bucketName,
    };

    this._bucket = new Bucket(this, 'Bucket', bucketConfig);
  }

  public get bucket() {
    return this._bucket;
  }
}
We now have a functional code that makes an s3 bucket that we can use. Next, we’ll need to set up some tests for it.
Test
Add your test case code to the /test folder
Note: This file has been created with all of its code commented out. Please uncomment it.
S3Bucket.test.ts
// verify s3 bucket name defaults
import { App, Stack } from 'aws-cdk-lib';
import { Template } from 'aws-cdk-lib/assertions';
import { S3Bucket } from '../src';

// verify s3 bucket name defaults
test('Verify S3Bucket can be created with defaults', () => {
  const app = new App();

  const stack = new Stack(app);

  new S3Bucket(stack, 'ConstructId', {
    appConfig: {
      appName: 'appConfig_appName',
      envName: 'appConfig_envName',
    },
  });

  const template = Template.fromStack(stack);

  expect(template.toJSON()).toMatchSnapshot();
});
Build
To build and test the construct independently from the other constructs, navigate to the folder that hosts your new construct e.g. /constructs/s3-bucket.
The following command will build, test and run eslint with automatic fixes.
npm run build
Please make sure that the code coverage is acceptable or your pull request will be rejected.
Identify and Fix code quality issues
This project uses ESLint and Prettier to perform static code analysis and fix formatting issues. Running the above build command will trigger the liniting process but it’s always good to have your IDE provide these issues to you earlier. If you are using VSCODE then the following plugins provide static code analysis and formatting.